


Previous in ToC: Simple, Tasty, Vegan Spanish Rice for Burritos
Next in ToC: Corn Tortillas are Easy to Screw Up, but also Easy to Get Right (And I've Done Both)
Tags: bread

Simple (but Delicious) Ordinary White Bread
I guess it's a bit of a guilty pleasure, but I really enjoy plain old white bread fresh from the oven. The loaves in this recipe don't get particularly big, so you probably won't make sandwiches with them, but they have a simple deliciousness that goes well with lots of things: peanut butter (especially when toasted), cheeses, dips like hummous, or just butter. (Try butter mixed with chopped chives, a nice blue cheese like bleu de basque, a good late bottled vintage port, cherry tomatoes and a few other goodies like dill pickles or green olives for a very satisfying lunch. Just remember that you're going to want a little nap afterward.)
Homemade bread really has a bit of an undeserved reputation of being a time waster. The initial work is probably about 30 minutes, and then most of the rest of the work is done by the yeast while you're off doing other things. The sight and smell of freshly made bread on a cooling rack makes the time seem completely irrelevant.
Ingredients
1 pkg active dry yeast
1 3/4 cup filtered or bottled water, heated to 100 °F, or as instructed on yeast package
1 tsp honey
4 1/2 cups of bread flour (if you're using a scale, which is recommended, weigh out 500 g or a little more than a pound)
1 Tbl extra virgin olive oil
2 tsp fine sea salt
extra flour for kneading
Directions
Pour all but 1/4 cup of the water into a large bowl. Mix the honey with the remaining 1/4 cup of water in the measuring cup. Add the yeast and wait 5 minutes for the yeast to proof. If you have good yeast and the water temperature is right, the volume should double and a bubbly froth should develop on top.
Combine the proofed yeast mixture with the water in the bowl and mix in the olive oil.
Add flour a little bit at a time, mixing well as you go.
After about 3/4 of the flour has been added, add salt.
Continue mixing in the remaining flour.
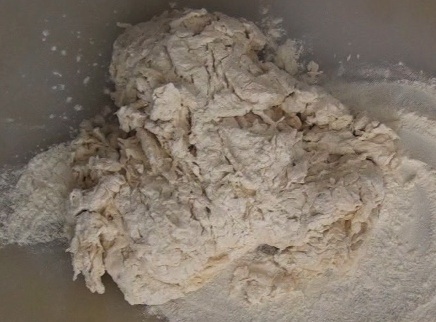
A shaggy mass of dough should form after mixing for a while. At this point, dump the dough out onto a floured kneading board:
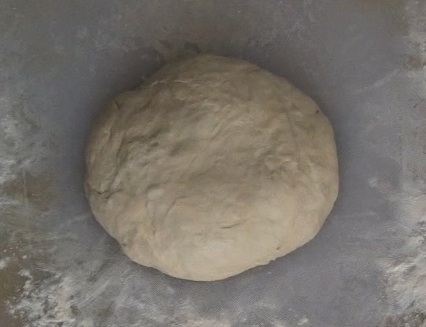
Knead the dough for 15-20 minutes, sprinkling flour a little bit at a time to reduce stickiness. (Don't overdo the flour though.)

After kneading, the dough should be smooth and no longer sticky. It should have a texture a little bit like your earlobe.
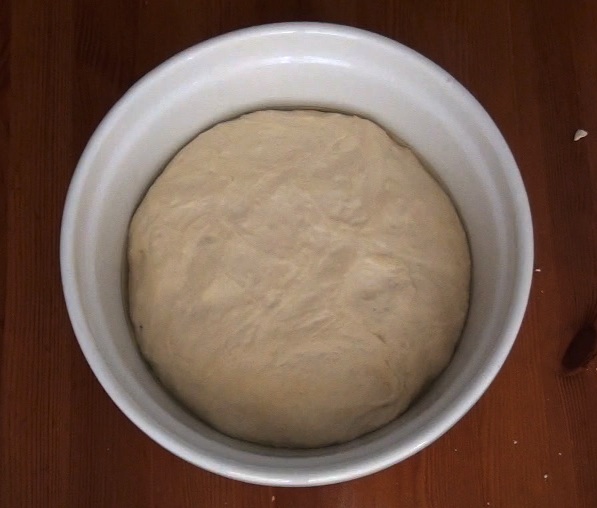
Lightly oil a large bowl and add the dough. Swish the dough around so that it is covered in oil. Cover the bowl with plastic wrap, and leave it in a warm place to rise for approximately 90 minutes.

When the dough is double it's original volume, the first rise is done:
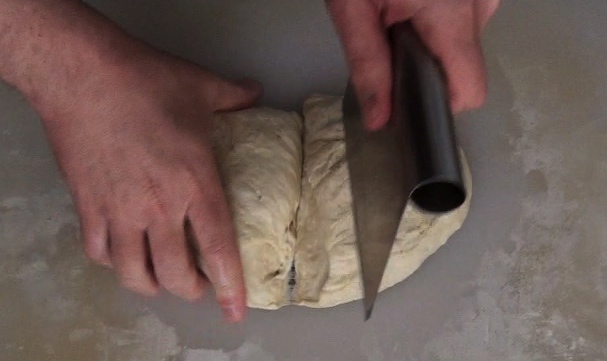
Remove the plastic wrap and rapidly punch the dough down, releasing trapped gases. Transfer the deflated dough to the kneading board and knead for another five minutes. Cut the dough in half with a bench knife:
Form each half into a long flat shape and press into lightly buttered loaf pans

Cover the loaf pans with a tea towel and allow dough to rise to double volume a second time, usually about 45 minutes. Preheat the oven to 425 °F toward the end of the rise.

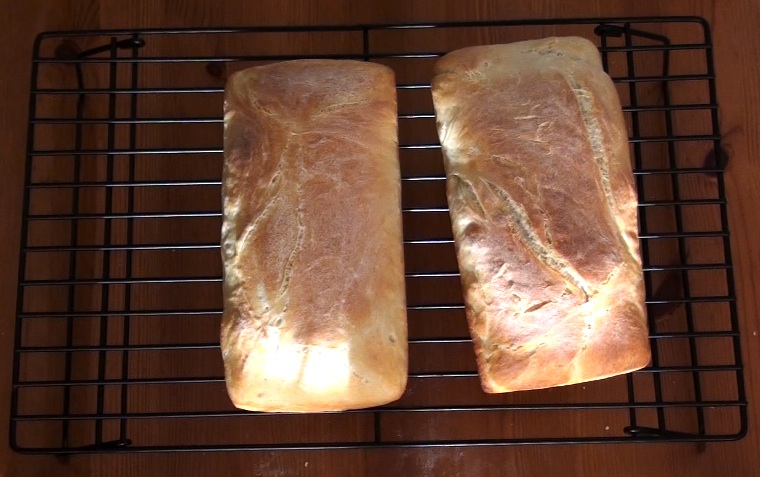
(For a crisper crust, place a pie tin full of water into the bottom rack of the oven just before putting the loaf pans on the top rack. Remove the pie tin after 15 minutes of baking.) Bake for approximately 25 minutes, until golden brown on top. The bread is done if it makes a hollow sound when you take it out of the pan and thump the bottom with your fingers. Transfer to a wire cooling rack:
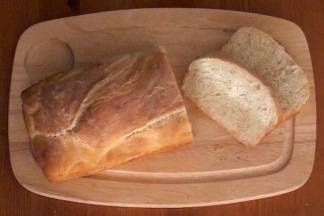
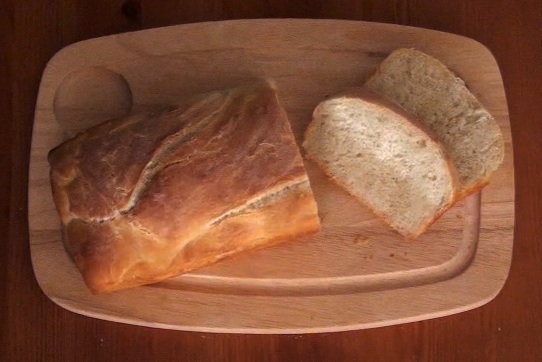
After the bread has (mostly) cooled, it can be sliced with a serrated bread knife:
Want more like this? Please subscribe via the RSS Feed so you can read new posts on your favourite news reader.
Posted: Thursday, March 10, 2011